House as Code
Introduction
Two years ago, I started building my house. Right from the get-go, plans kept changing—excavation had to go deeper to reach solid ground, so we added a basement; my third kid was on the way, meaning we swapped the garage for an extra bedroom; and our blueprints were constantly evolving with the architects.
3D Printing for a New Perspective
One day, I decided to 3D print the entire house at a 1:100 scale. Mostly for fun, but also to better visualize the design in three dimensions. The concept was simple: take the 2D blueprints and give them real depth. Fortunately, the house’s layout is straightforward—a collection of cuboids forming the concrete base, stairs, beams, and more.
Modeling as Code with OpenSCAD
Being a developer, I saw a perfect opportunity to merge construction with code. I started modeling my house declaratively using OpenSCAD, a free tool for creating 3D CAD objects.
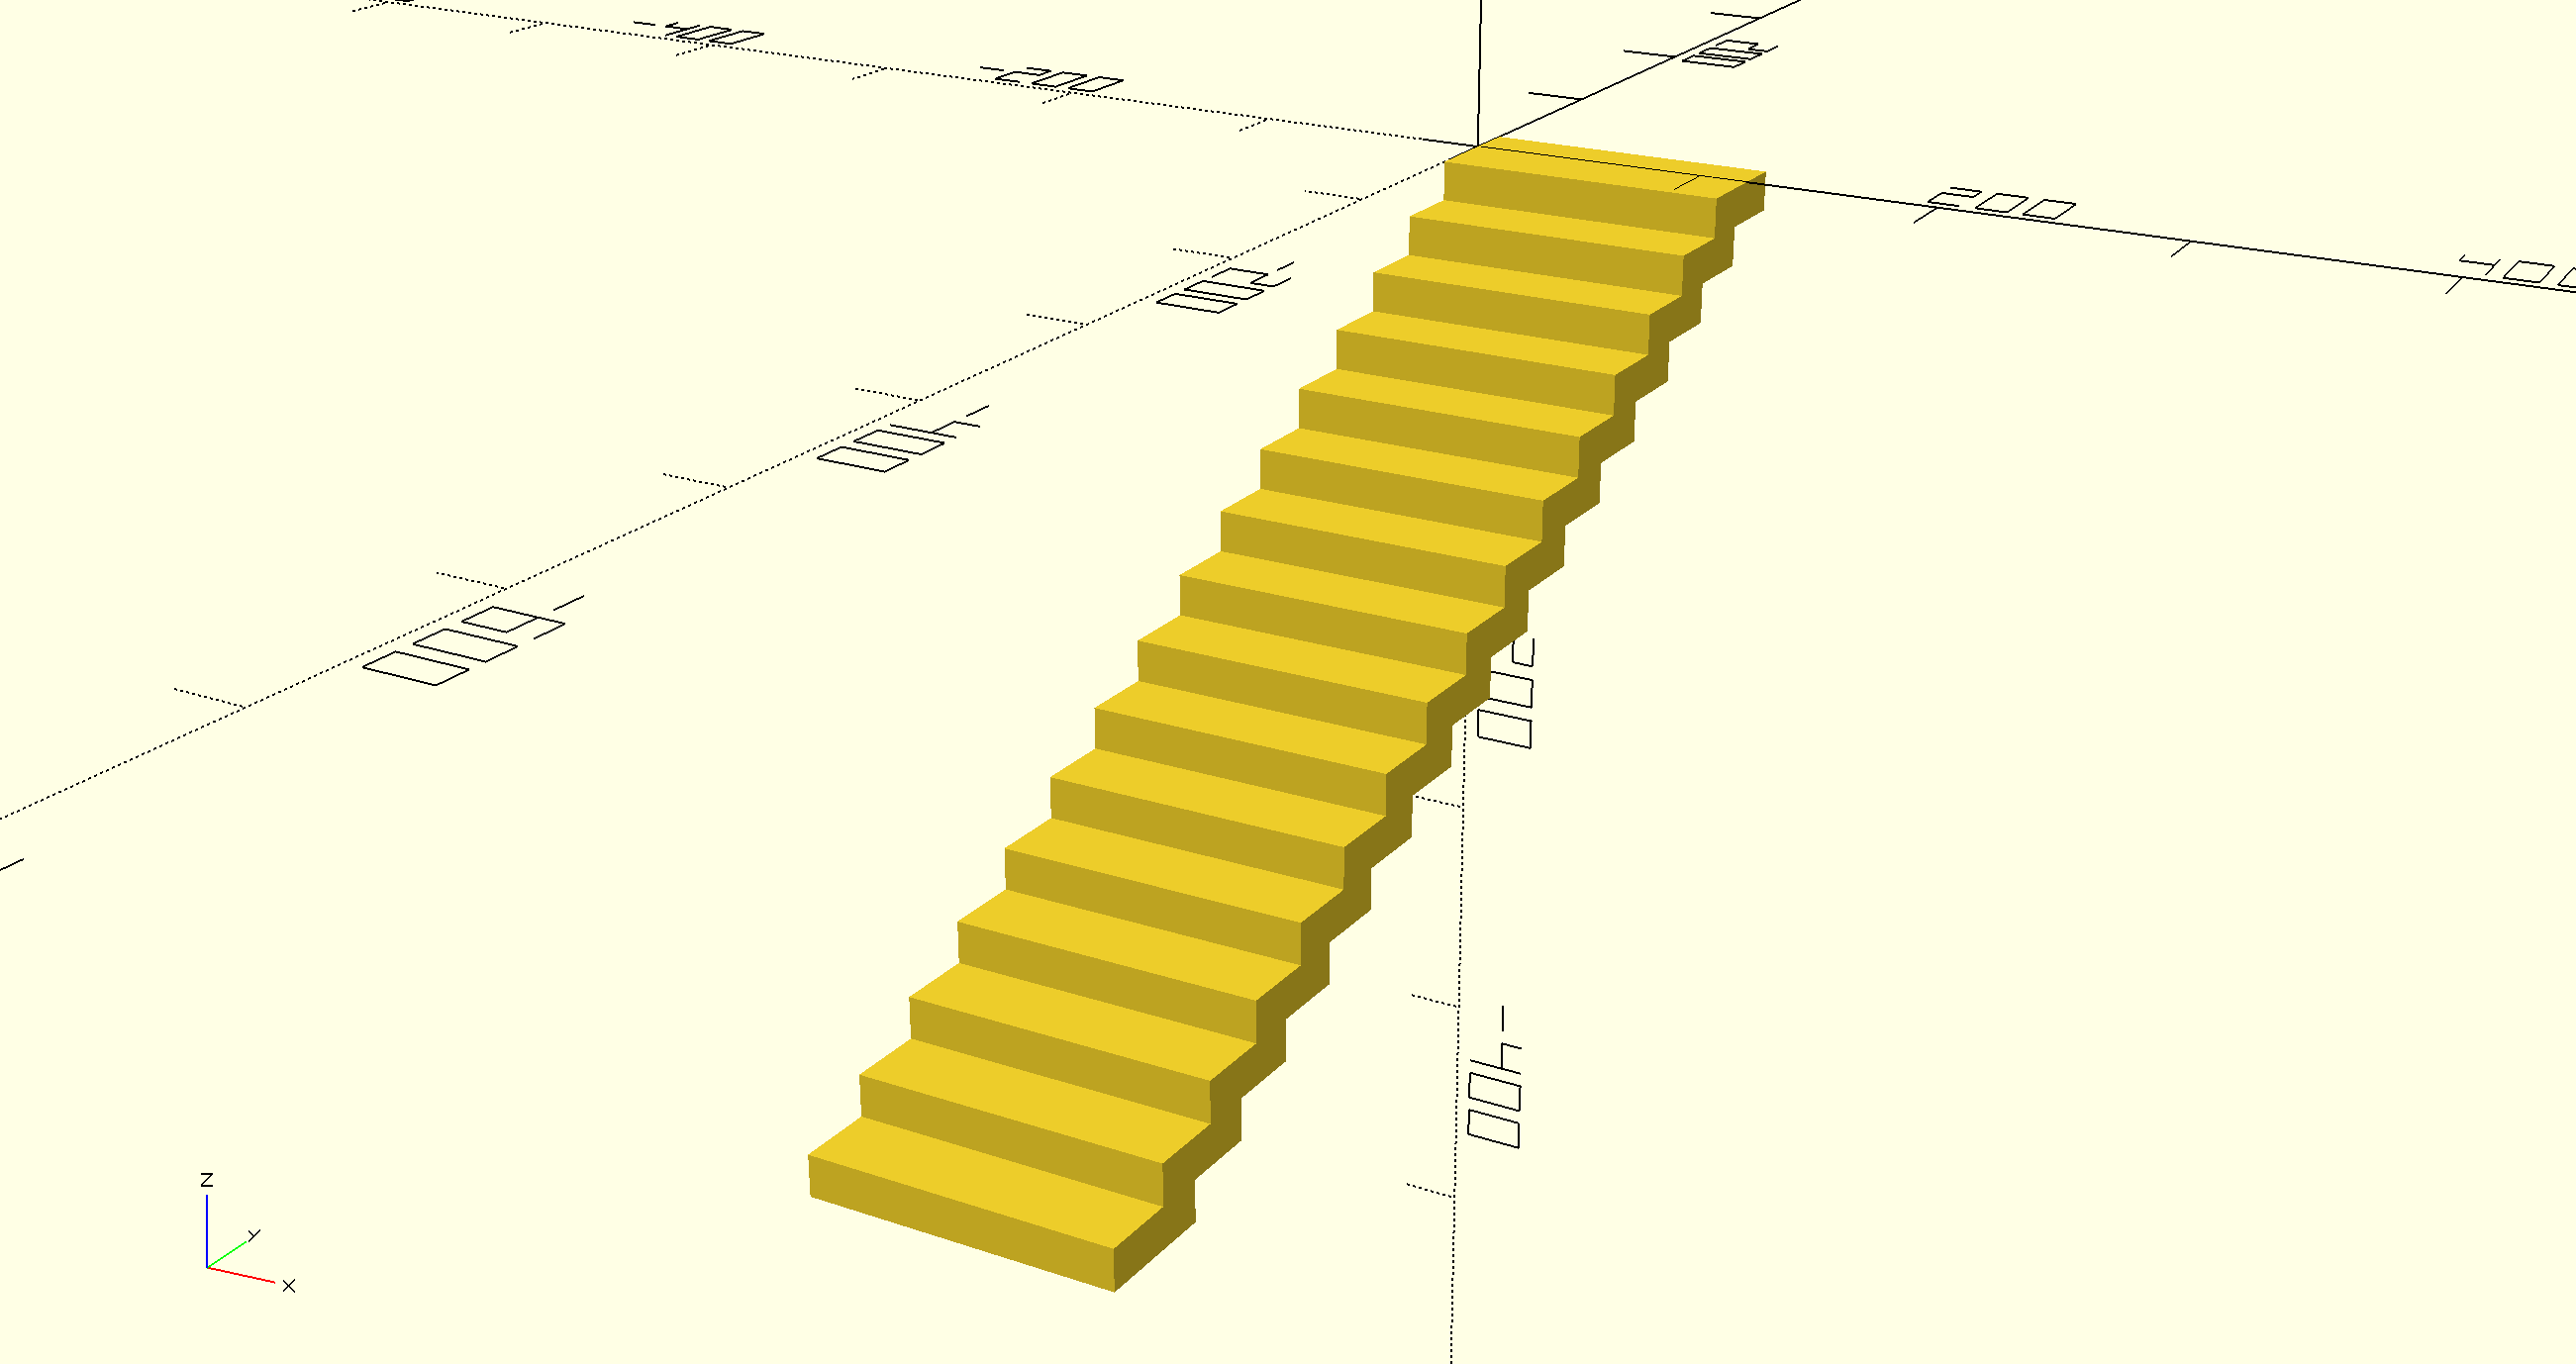
Getting Started: The Stairs
I kicked things off with the basement stairs. Positioning each step manually would’ve been a pain, so I used a simple for-loop to automate the process:
module stairs() {
    step_height = 16;
    step_depth = 30;
    total_height = -260;
    steps = abs(total_height / step_height);

    for (i = [1:steps]) {
        translate([0, -i * step_depth, -i * step_height]) {
            cube([120, step_depth + 20, step_height]);
        }
    }
}
Building this module convinced me that OpenSCAD is great for programmatically defining complex structures. Plus, with AI tools like ChatGPT in your corner, you can even get help generating code based on your requirements!
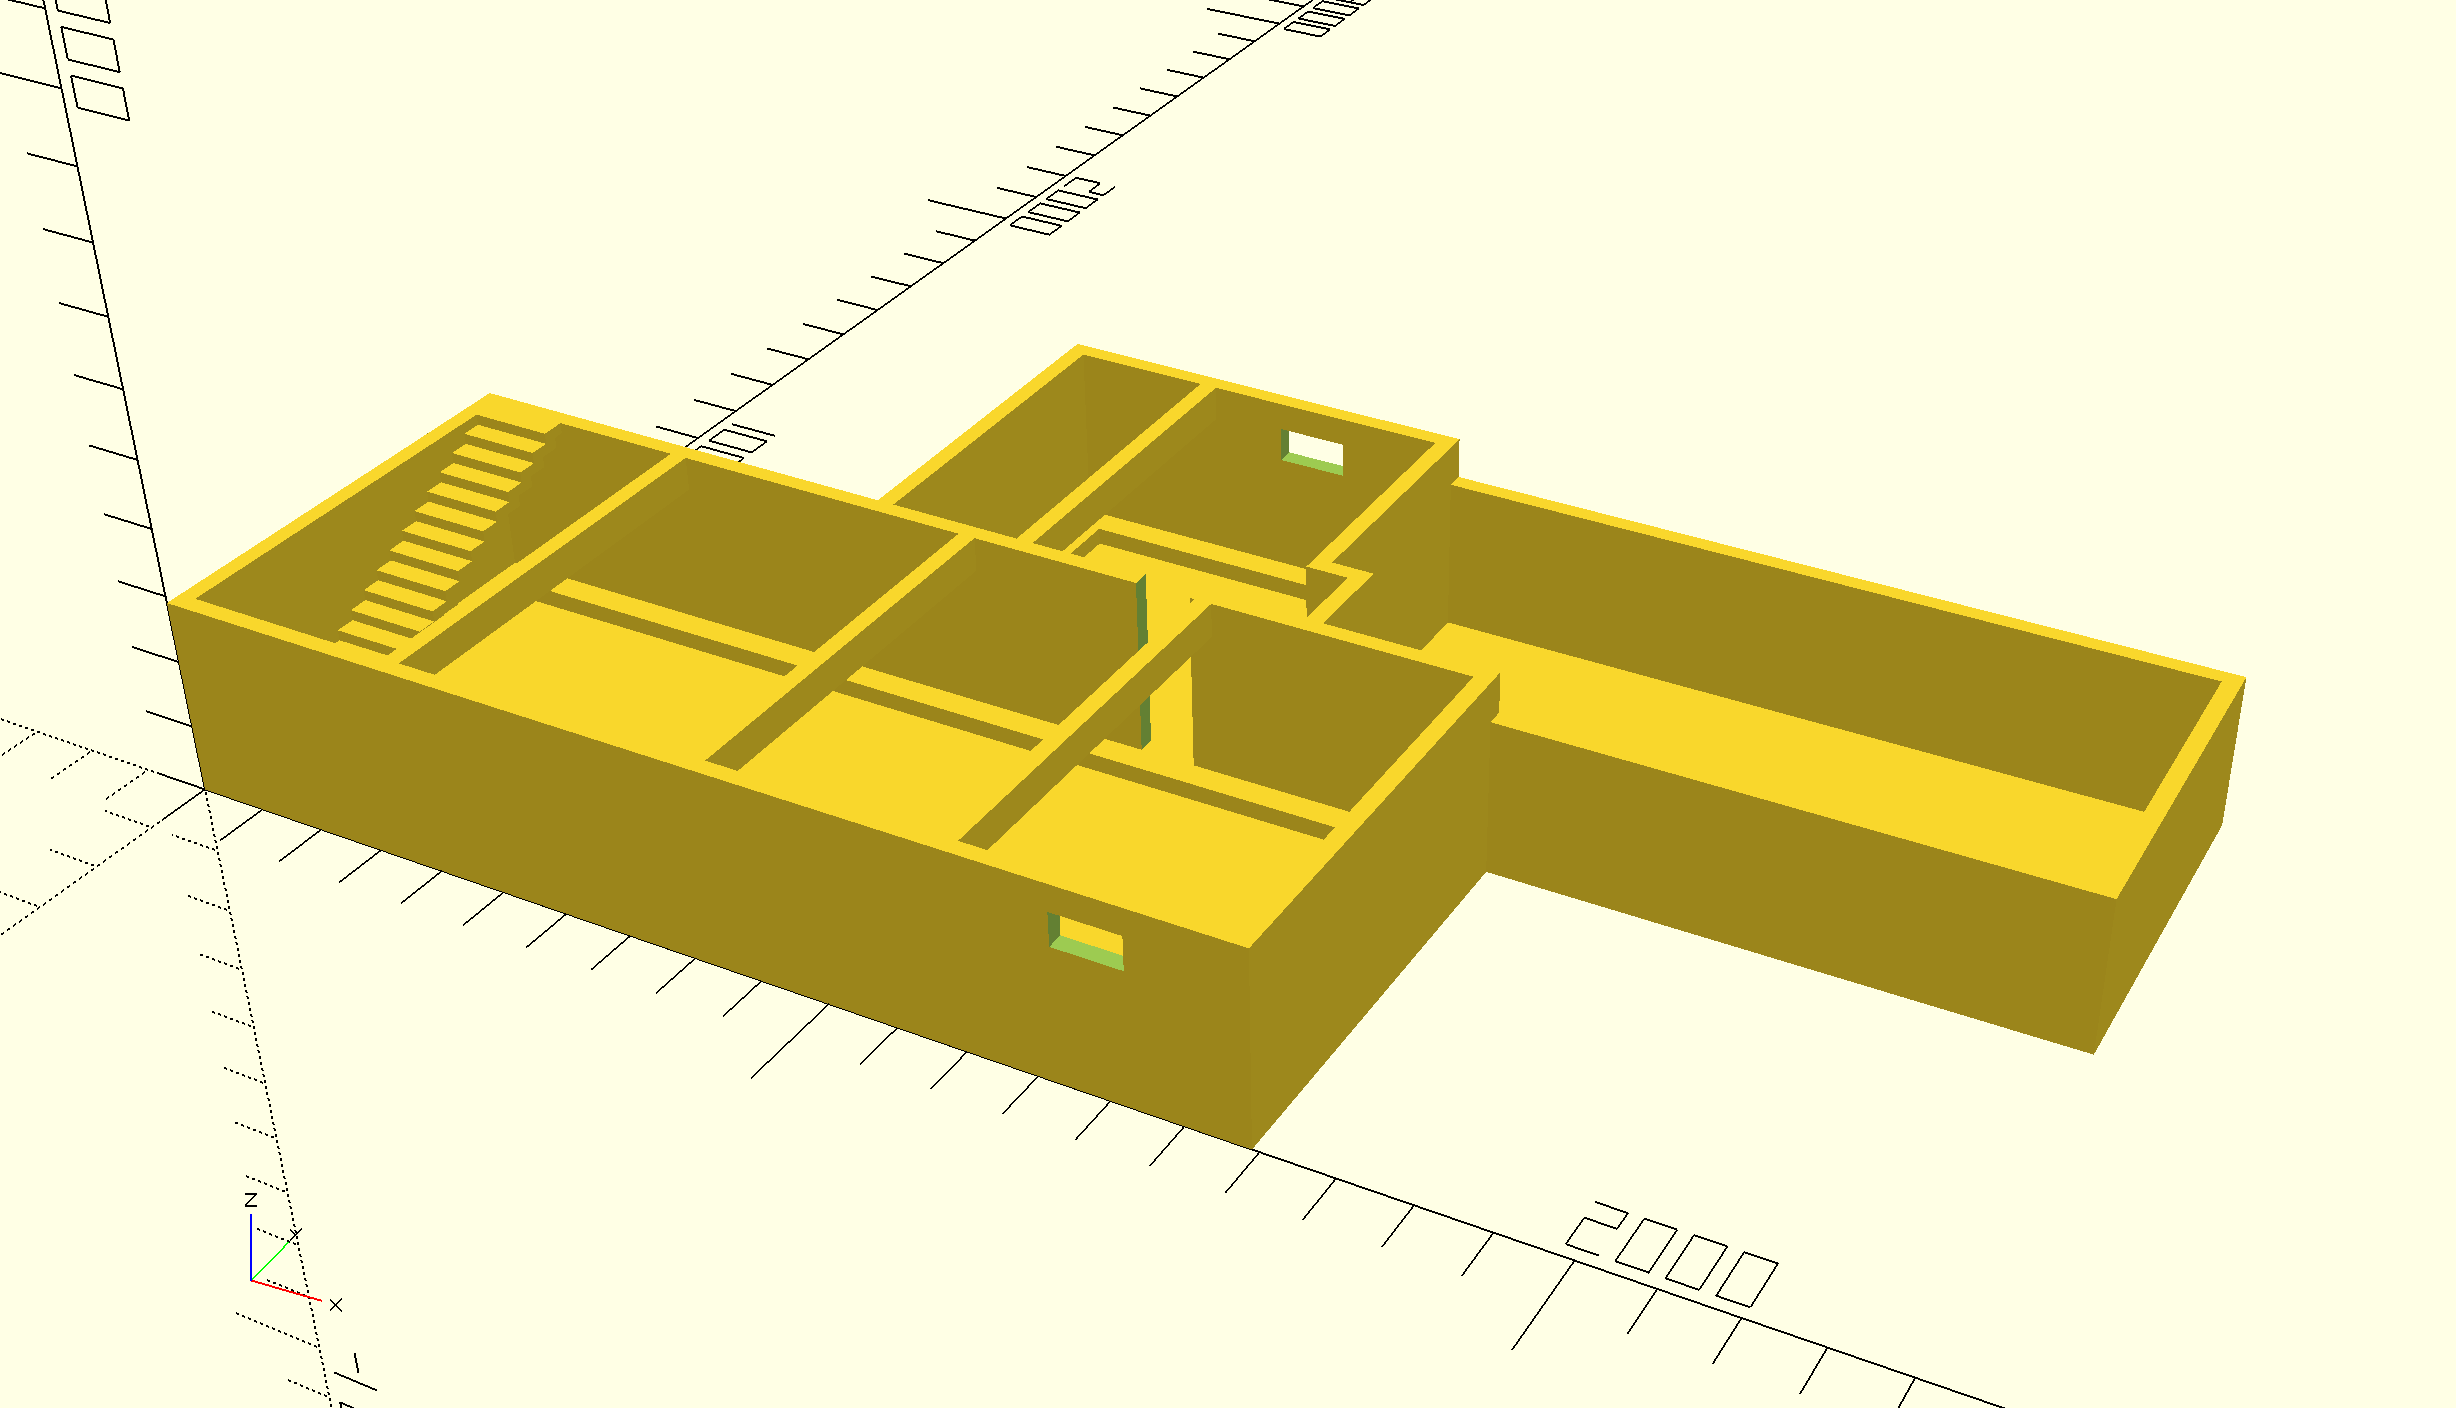
Constructing the Basement
Next up, I assembled a series of cubes, carefully translated into place, with cut-outs for doors and windows. Here’s a snippet from the basement module:
module basement() {
    module underlaid_concrete() {
        cube([1590, 650, 5]);
        translate([660, 650]) {
            cube([1738, 520, 5]);
        }
    }

    module basement_room_1() {
        cube([25, 650, 290]);

        difference() {
            cube([1590, 25, 290]);

            // Window
            translate([1325, 0, 200]) {
                cube([100, 25, 50]);
            }
        }

        translate([1565, 0, 0]) {
            cube([25, 650, 290]);
        }

        difference() {
            translate([0, 625, 0]) {
                cube([1590, 25, 290]);
            }
            translate([1078, 625, 0]) {
                cube([80, 25, 290]);
            }
        }
    }
}
With this approach, I have full control over every detail — and I can immediately explore the model in 3D!
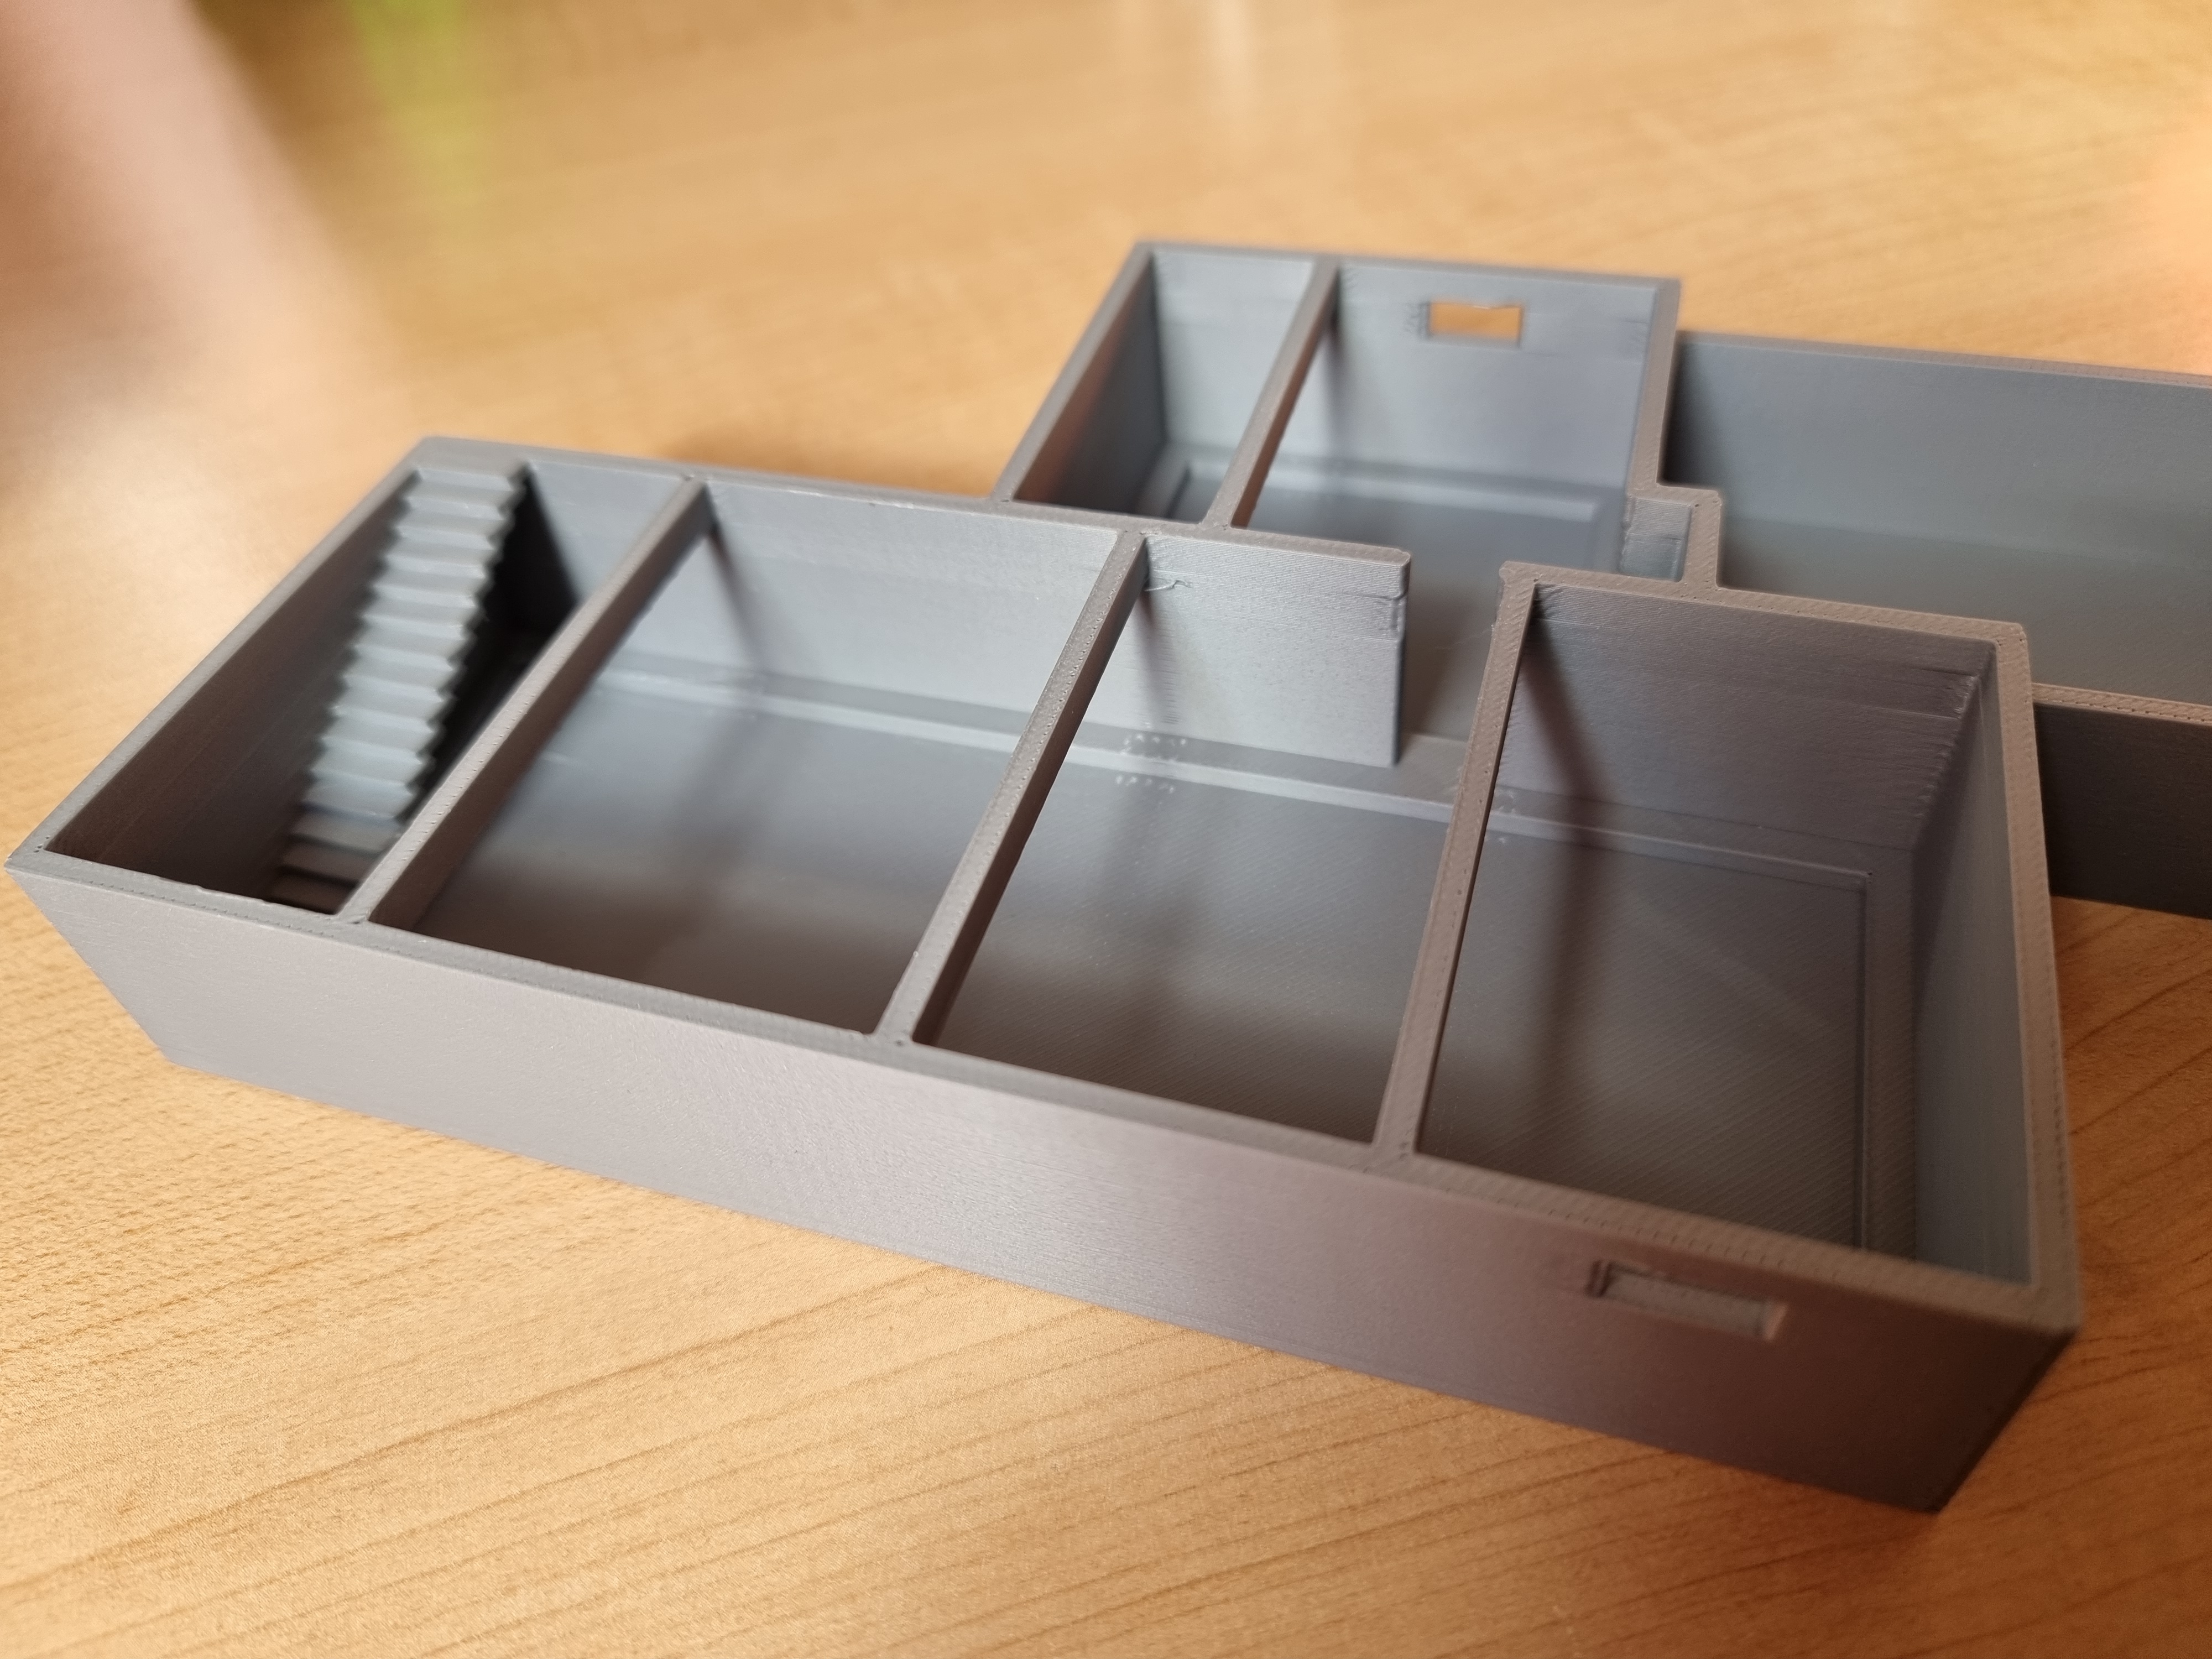
From Digital Model to Physical Print
After finishing the model, I exported it as an STL file and sent it off for 3D printing to my brother. Check out the printed basement:
Reflections and Next Steps
I’m really enjoying the “modeling as code” approach. The best part? You can version control your design. I committed my OpenSCAD files to GitHub, and since then I’ve modeled other parts of my house — the entrance, the verandah, even the fence. This iterative process makes it easy to tweak dimensions and see the changes immediately.